1985 AMC Jeep Grand Wagoneer
Carburetor Vent Solenoid Rebuild
The Motorcraft
2150 carburetor on the AMC 360 has three fuel bowl vents. Two
vertical vents into the aircleaner housing and an external vent
to collect vapor when the engine is not running. A solenoid
activated valve keeps the external vent line shut when the engine is
running. Well, it is supposed to, but often when examined the tip
of the valve stem is missing. Where did it go? Your
carburetor bowl. :( Why?
Probably extended exposure to heat and compenents of gasoline,
especially today's reformulated fuels eventually caused the rubber(?)
to disintegrate. Unfortunately, this part, like the vapor
canister, is not readily available new. So, its repair time.
This is NOT a quick or easy repair. Hopefuly this write-up
will make it a little easier and let you hunt for tools and materials
before you start in.
>Also recomended is How-to: Rebuild your fuel bowl vent solenoid by "iroc86" on the IFSJA forum.
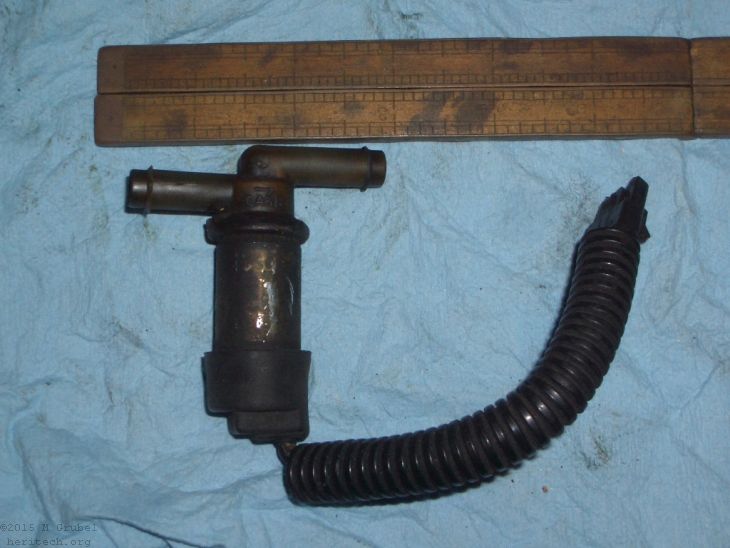
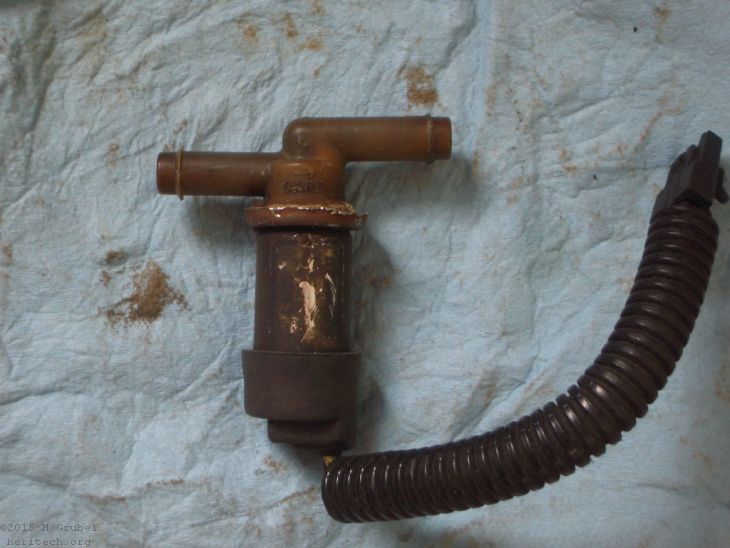
1. Solenoid valve before dissassembly.
Test valve for operation by turning ignition to "run".
Engine does not need to be running. This will power the solenoid and
the plunger will extend. If the tip survives, then no air can go
through (will hold a vacuum). If the tip is gone, look inside to
see the metal plunger. Turn ignition off and the plunger is no
longer visible.
Note the orientation of the inlet and outlet to the solenoid itself.
|
 . .
|
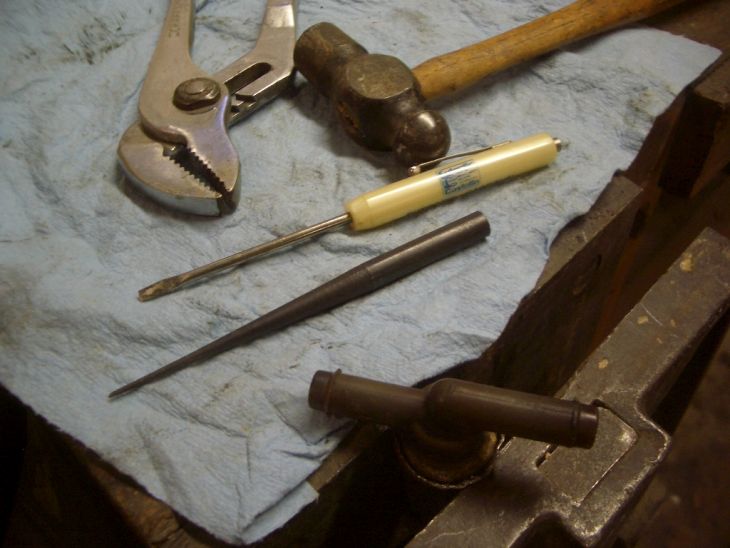
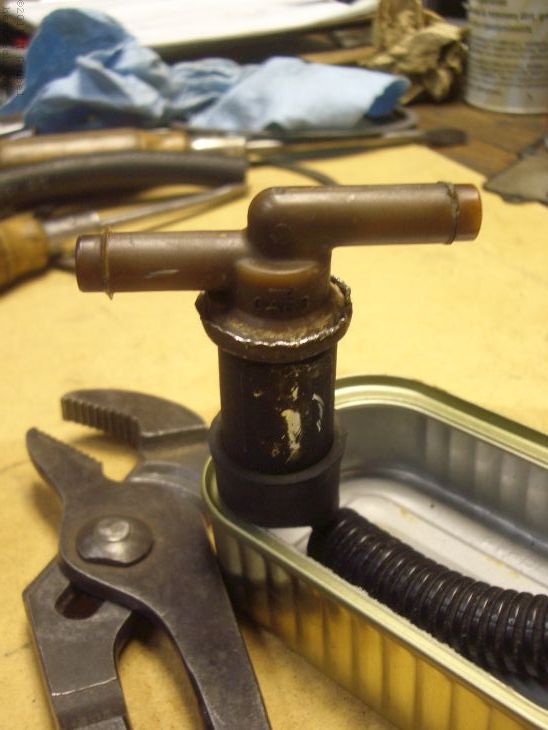
2. Open up crimp.
This is an excercise in patience and care. I found the best tools
I had handy for this operation were a very sharp and thin punch and
light hammer. After getting enough of the crimp open, the small
screw driver and channel-locks were also useful.
|
|
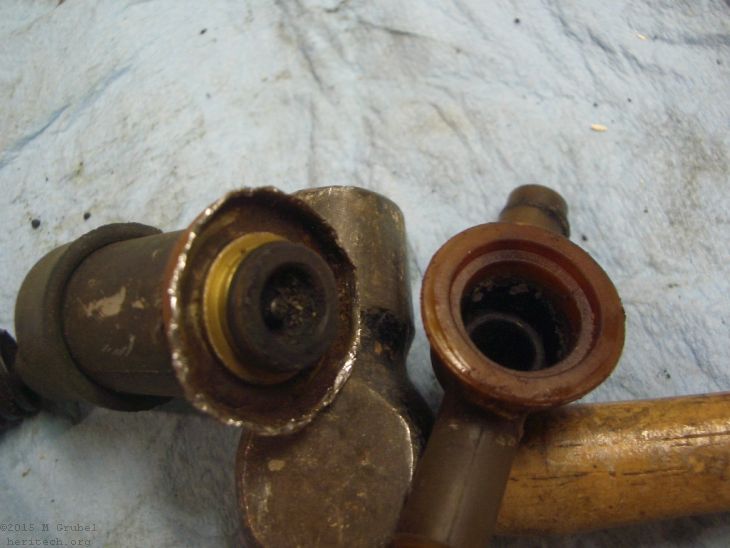
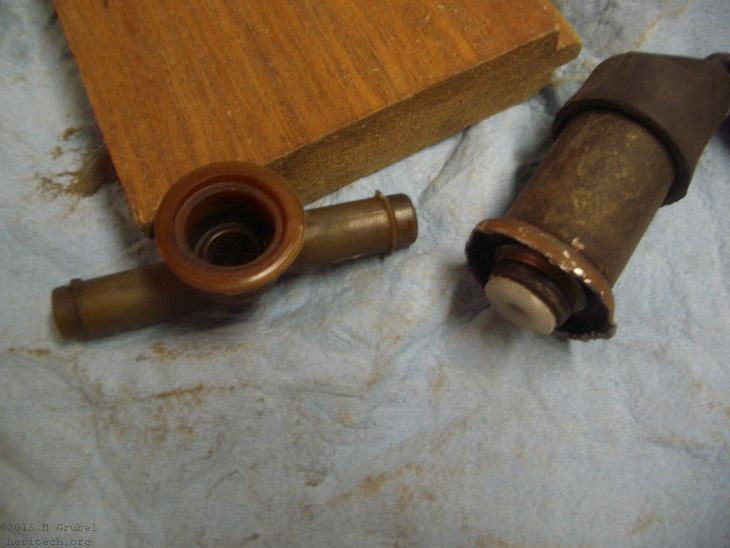
3. Inside of Valve.
Notice the charcoal bits along with other dirt that hadn't
yet made it to the carb bowl. Charcoal bits? Where's that
from? The Vapor Canister. You can read about rebuilding
that here.
The crimp itself does not do any sealing. There is a o-ring that
seals the actuator to the base. It can be seen more clearly
in the next photo.
|
|
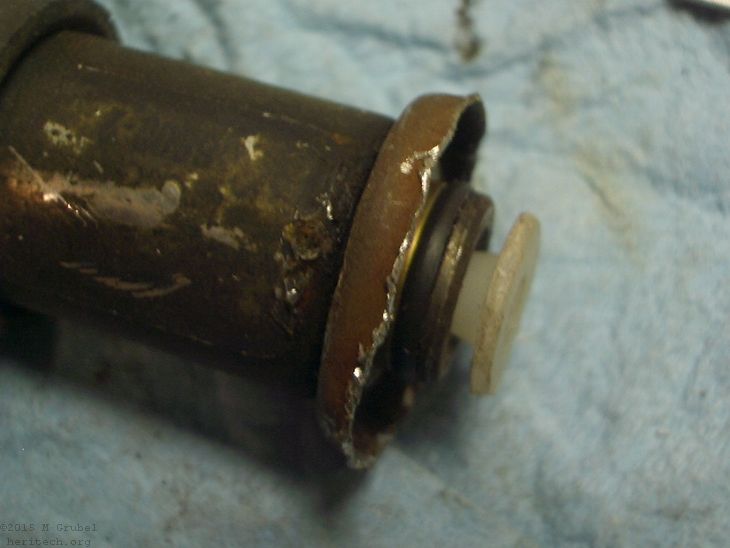
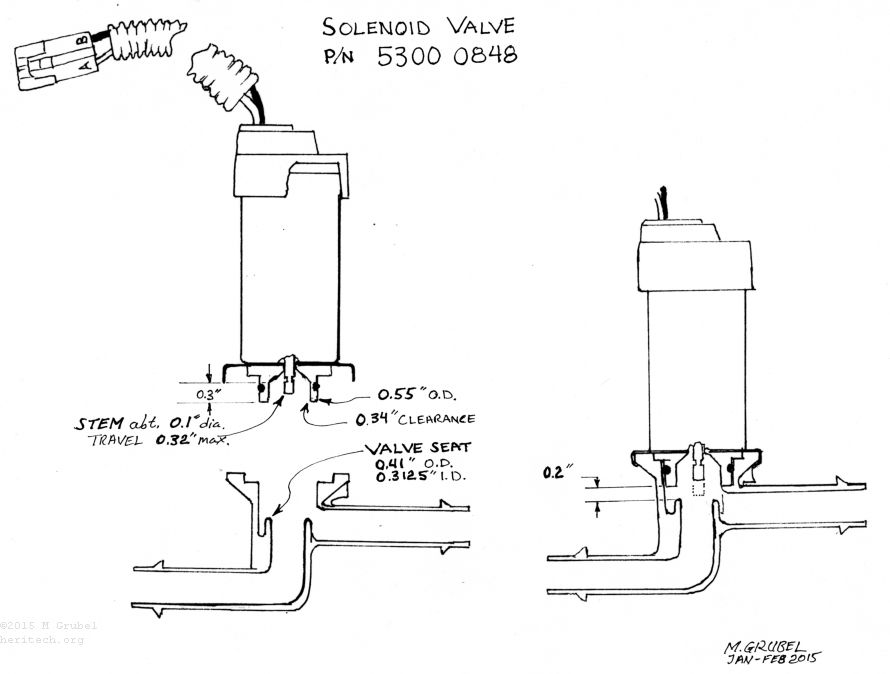
4. The valve seat has an i.d. of
5/16". Therefore the original tip either went into the seat
or was wider than 5/16". I tried two approaches, one
starting with hardwood dowel about 11/32" and the other with a nylon
"button". The button may have been a form of wall anchor for
picture hanging. You'll need to get creative here. What
you choose probably will depend on the materials and machinery you have
access to. A small lathe or milling maching opens up
possibilities. The drawing at the bottom of this page has measurements which should prove helpful.
The valve stem itself has a groove to help retain the tip. Again I believe a hard rubber was the original material.
|
|
5. Cleaned the valve with Goop. Not sure
what chems would be safe so I was conservative. Honestly, carb
cleaner would probably be OK on thehard white plastic ( nylon?).
Keep it away from the o-ring.
|
|
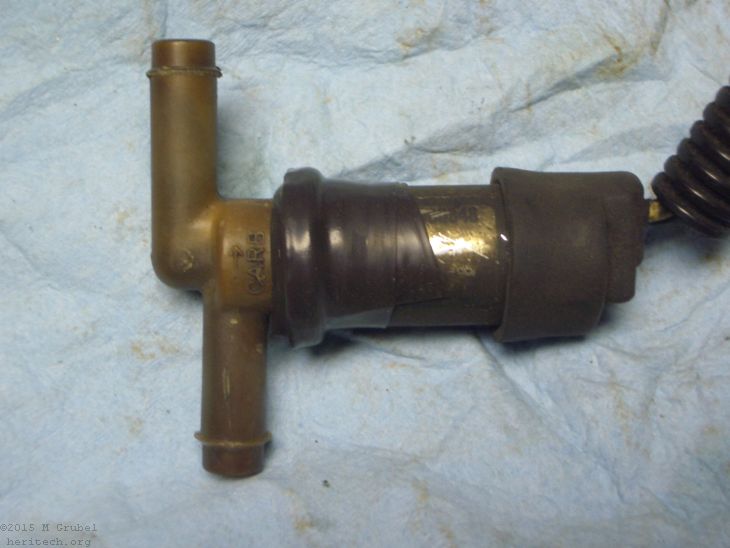
6. Slide the two parts together and orient as it was originally. Orientation is probably not super critical.
|
|
7. Test and recrimp. I used channel locks.
|
|
8. Added some self bonding tape to wrap it up.
|
|
|
|
|
|
Cutaway Assembly Drawing of Solenoid Valve 5300 0848
Measurements were made with machinists scale and drill bit shanks. You should verify!
Disclaimer:
If you take advice, or copy something I have done,
you are on your own. I'm just trying to be helpful, but you need to
make your own decisions, and know about or discover the risks before barging
ahead on any endevour.
Claimer:
The information and pictures on this page are free
to use and share by all and may not be sold. If you steal
something I have written, or a picture
I have taken or drawn, you are a thief. Plain and simple.
If
you wish to quote something, you are free to do so. All I ask for
is proper credit.
rev. 3 Feb 3 Jan 2015